Validating a monitoring system in a GxP environment — where to start
GxP monitoring system validation explained: validation plan, IQ/OQ/PQ, mapping, calibration and the documentation the regulated user owns end to end.
Zespół Nextriv5 min read

In this article
GxP monitoring system validation is a phrase that commands respect in pharma and the laboratory — and sometimes causes paralysis, because it sounds like a months-long project with a fat binder at the end. In practice it is an orderly process that breaks down into a few clear stages. Let us clear up the fundamental misconception right away: validation is not something you buy together with the hardware. It is a process on the user's side — it is the regulated organisation that demonstrates its monitoring system works as intended in its specific environment. The supplier can provide the devices, documentation and features that make that demonstration easier; the GxP compliance verdict is issued by the user itself, within its own quality system. In this article we show where to start and how not to drown in the paperwork.
GxP monitoring system validation — what it means
GxP is the umbrella name for the good practices: GMP (manufacturing), GDP (distribution), GLP (laboratory studies). They share one requirement for systems that record data critical to product quality — it must be demonstrated, with documentation, that they do what they are supposed to do, repeatably and reliably. Validation is precisely that proof.
For a temperature and humidity monitoring system this means answering three questions:
- Is the system correctly installed — the right sensors, in the right places, with current calibration?
- Does it operate to specification — do thresholds, alarms, notifications and data recording match what was designed?
- Does it maintain that compliance over time — in real conditions, season after season, despite opened doors and power fluctuations?
These are the three classic qualification questions: installation (IQ), operational (OQ) and process/performance (PQ). Before you get to them, however, you need a plan.
Validation plan and risk analysis — where it all starts
Every validation starts with two documents, not with mounting sensors.
The validation plan describes the scope: which rooms and equipment are covered, which parameters are measured, what the acceptance criteria are and who is responsible for what. The risk analysis establishes where the consequences of an error are greatest — and sets the bar highest there. A vaccine fridge and a shelf of supplements do not call for the same rigour; risk analysis lets you avoid overspending attention where the stakes are low and underspending where they are high.
Everything else follows from these two documents: how many measurement points, which thresholds, what reporting frequency and what the response to a deviation should look like. Only with the plan in hand is it worth reaching for hardware.

IQ / OQ / PQ in monitoring practice
The three qualification stages translate into concrete activities.
IQ — installation qualification. You verify and document that the right devices are installed in the right places: a sensor list with serial numbers, current calibration certificates, a placement diagram, the platform software version. It is an inventory with evidence — the foundation the following stages stand on.
OQ — operational qualification. You test that the functions work as designed. You force a threshold breach and check that an event with a code and severity level is created. You check that the notification arrives over all the planned channels, that escalation passes the alarm on after no acknowledgement, and that a loss of connectivity is detected and recorded. OQ is a set of test scenarios with expected and observed results.
PQ — process qualification. Closest to reality: the system runs in real conditions for an agreed period and you confirm it stays compliant. This is where the temperature distribution study (mapping) belongs — placing sensors at the chamber's extreme points (the warmest and the coldest) to verify nothing drifts out of range anywhere. In GxP the same logic applies to cold rooms, incubators and climatic chambers, and the conclusions of the mapping directly indicate where the permanent monitoring sensors should stay.
Data integrity — what GxP watches over
Validation does not end with the measurement being accurate. GxP asks just as firmly about data integrity: is the record complete, attributable to a person, unalterable and reproducible. A set of attributes summarised by the ALCOA+ acronym helps here — data should be, among other things, attributable, legible, contemporaneous, original and accurate. It is this area that most often decides the success of a computerised system validation.
On the platform side this requirement is supported by concrete mechanisms: an audit trail recording changes and access (with multi-year retention), roles and permissions (four roles, data isolation between tenants, two-factor login), a calibration register with the calibration date, the next due date, the certificate and reminders, plus PDF reports — in the extended variant cryptographically signed (SHA-256 digest, verification address and QR code), which lets you demonstrate the document was not altered after generation. The calibration register itself deserves a separate chapter of any validation — when and how to calibrate sensors is covered in our guide to temperature sensor calibration, and the requirement to retain data for years — in the piece on measurement data retention for audits.

What to measure with in high-rigour chambers and processes
Mapping and chamber qualification can be demanding measurement-wise — from deep-freeze cold rooms to incubators and baths. Where ordinary electronics will not go, an industrial probe with a platinum sensing element does the job.
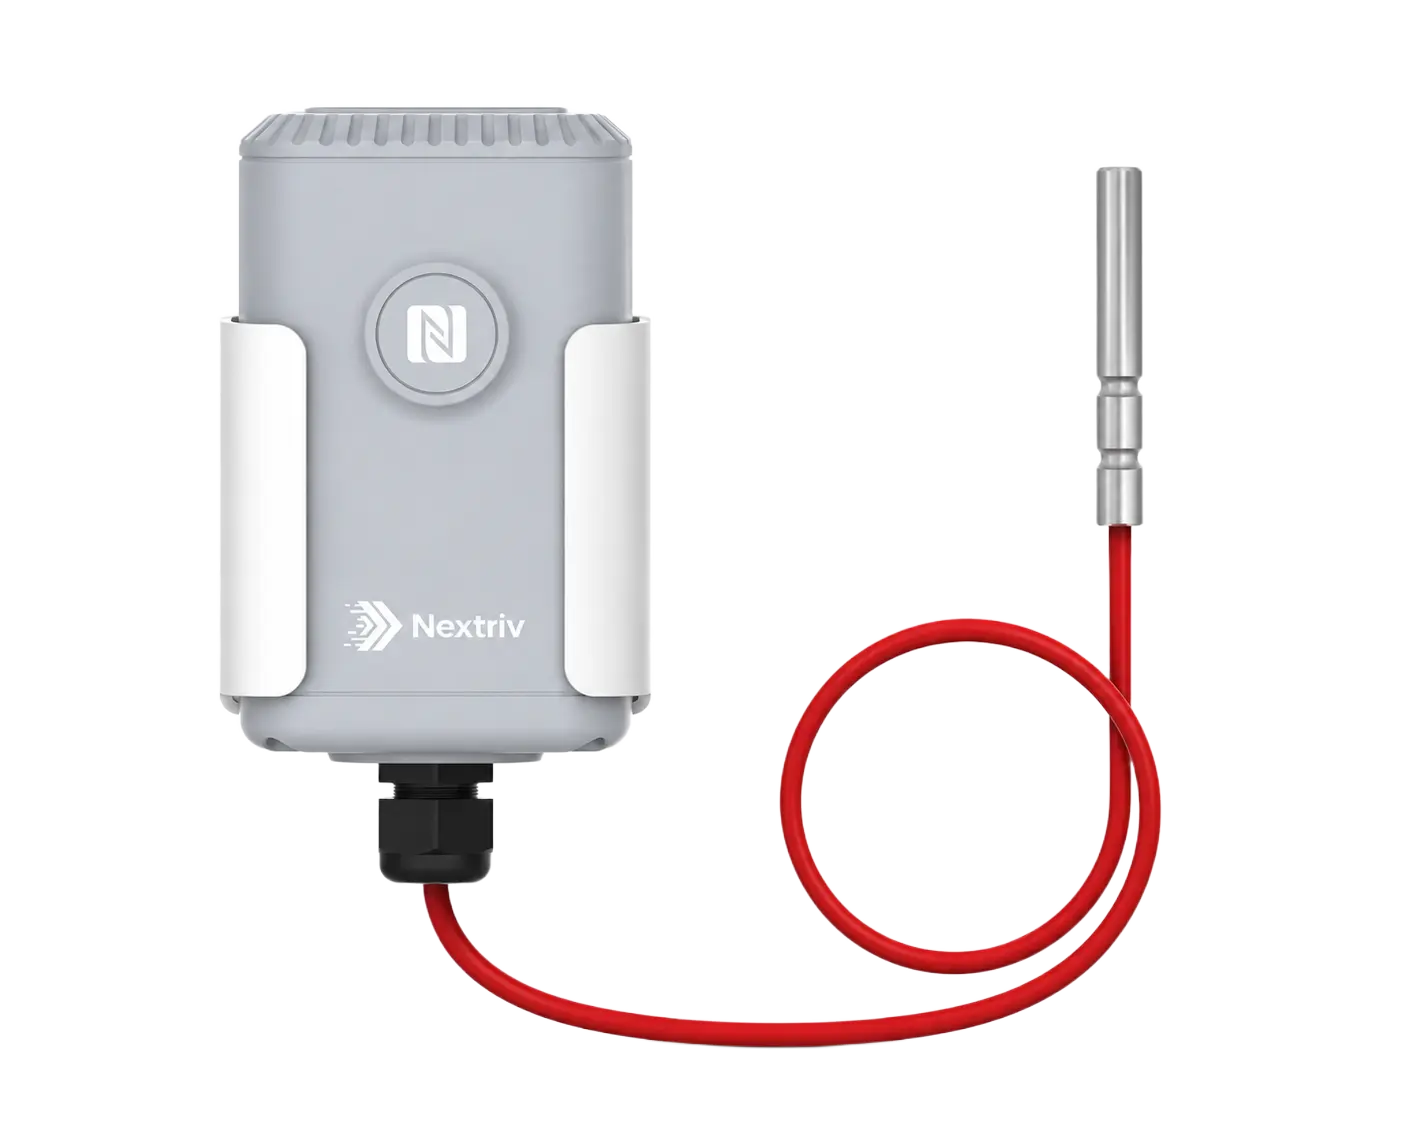
Nextriv Probe PT100 separates the measurement from the electronics: a platinum probe works inside the chamber (a 3-wire connection eliminates lead-resistance error, ±0.5 °C accuracy, 0.1 °C resolution) while the transmitter stays in a safe spot. Four factory range variants plus made-to-order probes cover the span from −200 to +800 °C, so the same device handles a validation freezer and a high-temperature chamber. A local buffer with retransmission after a connectivity gap makes sure the mapping run has no holes — and a complete record is the basis of the PQ report.
Where to start in practice
If you are to start today, the sequence is simple:
- Write down the scope and the risk — which rooms, which parameters, where the consequences of an error are greatest.
- Set the acceptance criteria — thresholds, permissible deviations, the required recording frequency and retention.
- Collect installation evidence (IQ) — sensors, calibrations, placement, system version.
- Test the functions (OQ) — thresholds, alarms, escalations, connectivity-loss detection, following scenarios with expected results.
- Run the mapping and the in-service period (PQ) and approve the final report within your quality system.
The organisation leads and signs this whole process — Nextriv supplies the devices and features that deliver the evidence, but does not replace the decisions of the responsible person and does not issue compliance certificates. What this supervision looks like in its target environments is shown on the solution pages for pharma and for laboratories.
Start with a pilot, not a binder
The most effective road to validation does not run through a perfect document up front, but through a working pilot on which you rehearse the OQ scenarios and collect the first PQ data. The FREE plan includes 10 sensors, the full notification channels and a year of history — enough to run a trial qualification of one chamber; the terms for longer retention, the audit trail and signed reports are compared in the pricing.
Book a short demo — we will show the audit trail, the calibration register and signed reports on live data, so you can see which parts of validation the platform takes off your hands.


